180 degrees of food lighting
I was doing a workshop for wonderful journalists and bloggers with the brilliant Smug Mug recently and demonstrated this simple technique to get the best out of lighting for food photography. The workshop I hope went really well but the most useful part of the afternoon according to the feedback was my 180 degreess of lighting.
Lighting for food is often an enigma. For the keen blogger the palpable excitement of taking a picture of the hot home baked crumble or just picked Braeburns in the perfect trug can sometimes lead to disappointment. More often than not a quick instagram shot can make the most miserable of lighting look funky and cool but stick any other camera onto it and it just doesn’t look the same.
In my opinion most food shots by bloggers that don’t look yummy are mainly due to dull lighting. All you actually need is a window, a piece of tracing paper some card and the knowledge of my 180 degrees of lighting. For once photography doesn’t have to be expensive. This should work even with a reasonable camera phone.
By moving the camera and table top around in a clock movement the light dramatically alters the way the food looks. It actually alters the yumminess of the food.
So I’ve constructed these 1970’s looking diagrams (as I’m hopeless with drawing programs) but what you can see is a table with the apples on, a camera, a window and some some tracing paper diffusing the light. The exposure will change as you change the angle of the camera and you’ll have to experiment with the various cameras you have.
I’m not trying to take amazing food shots when demonstarting this lighting which is why I’ve simply arranged some apples, but I’ve used these same princliples when shooting for major supermarkets and food manufacturers. So here are my four main setups.
0 degrees, front lighting. Not very cool!


Here you can see the food looks flat and unappealing. The apples have no modelling or shadow and as a result the look is purely of a shot that records the apples rather than adds to the taste appeal.
90 degrees side lighting: most food shots are taken with this method…


This lighting is safe. The food is well lit, has a little modelling and has good food appeal. There isn’t too much energy in the shot but this lighting is used for 90% of food editorial shots. By using either white or black card on the opposite side of the window you can change the look from clean to shadowy rustic quite drastically and this is where the artistic element is key.
130 degrees ¾ backlight: my favourite


This is my personal favourite as you get beautiful highlights and great energy but it’s still controllable and the food looks fantastic. This lighting is great for all types of food but is especially good lighting for liquids and soup in particular as the highlights reflect the liquids beautifully.
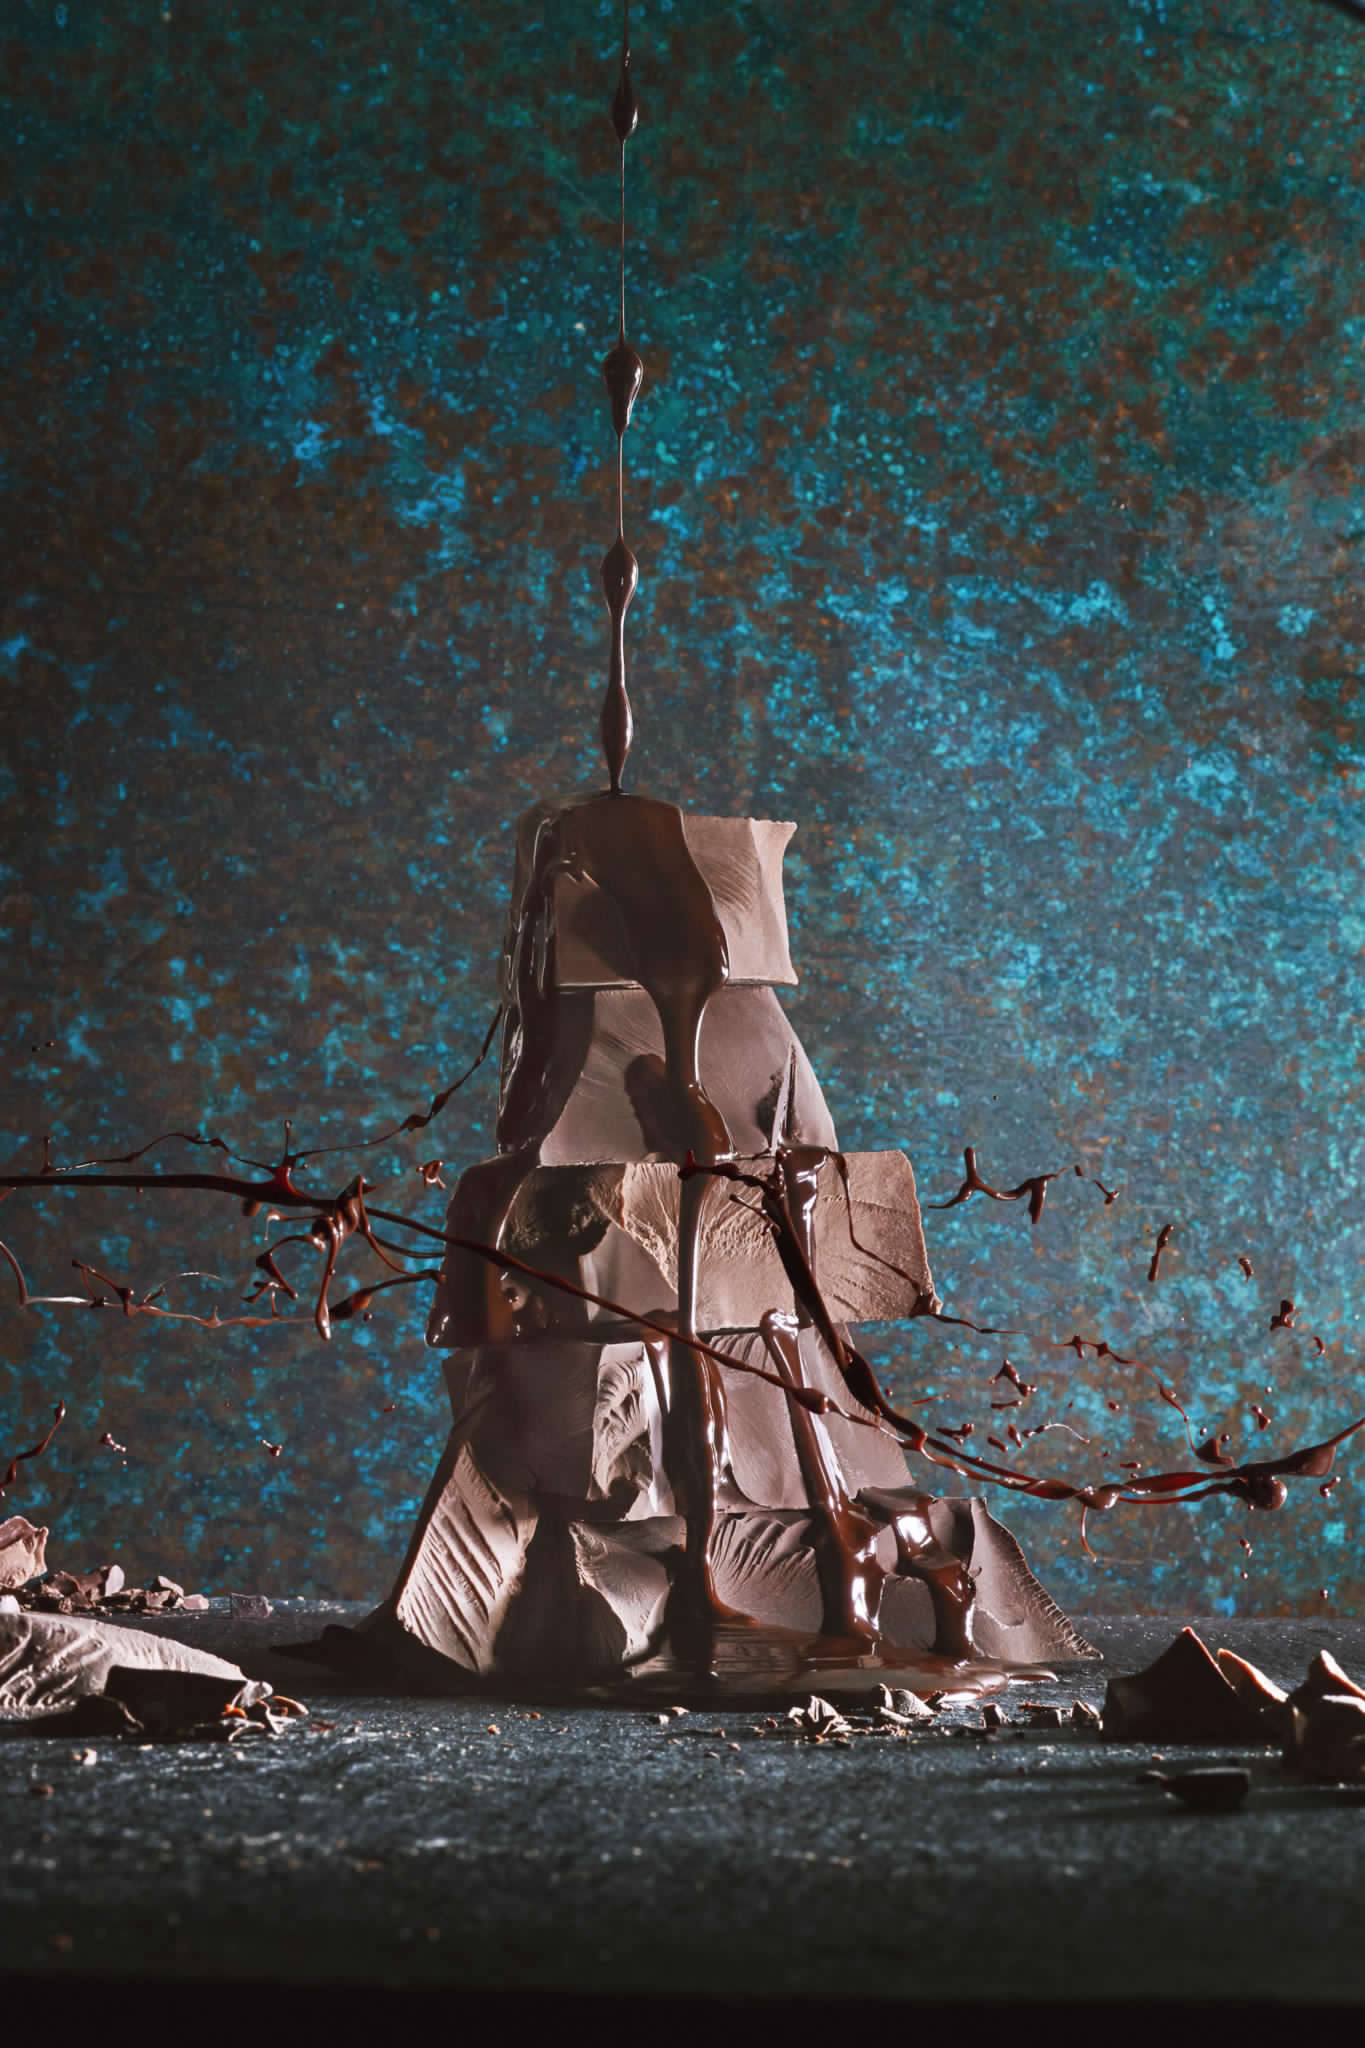
180 degrees backlighting

Backlighting is dramatic and beautiful and tricky to control. You need a lot of reflectors to push the light back into the food but the overall effect can be stunning. This lighting tends to blow the backgrounds out and often you need to compensate with the exposure to make the foreground look balanced. This is mood lighting which can produce some lovely flare and shadows but can be overdone so be careful.
So there you have it…. from the turn of a table you can produce a whole range of moods and lighting for food and still-life. It was a great workshop and it was a pleasure to meet the teams from Cherish PR and Smug Mug, all the journalists and bloggers. If you’re looking for a DIY website company that backs up your shots and lets you photo-share I was so impressed with SmugMug… you should check them out… www.SmugMug.com
thanks for reading
Howard